

.png)
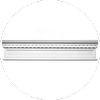


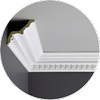
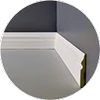
Our products are produced using a lightweight material, which means they are easy to fit.
1. Preparation
Take out a mitre box, saw, glue, joint compound and glue/jointing scraper. These are available in our webshop under “Accessories”.
Ensure the ceiling and walls are flat, even and clean (free from dirt and dust). We recommend putting up the cornice before painting the ceiling and before the wallpapering or painting the walls. Calculate in approx. 5-12% for waste and pattern matching, if any, depending on how large and decorated the cornice is.
2. Cutting
A good mitre box and saw are important prerequisites for quick and easy installation. If you have never used a mitre box before, then you might wish to read up on how to use it before you start using it. Select the mitre box type based upon the moulding height and width.
Measure out the moulding length you need and then cut the moulding. For most corners, cut the ends at a 45-degree angle. Ensure that you make your cut on the correct side of your marking and to turn the moulding correctly in your mitre box.
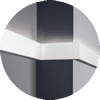
Cut the moulding for inward facing corners:
1. Mark the back side of the moulding to indicate which side is up.
2. Turn the cornice 180°
3. Place the cornice in the mitre box
4. Saw at 45°. (Saw towards the left if it is a left corner and to the right if it is a right corner).
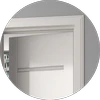
Fit the cornice and adjust if necessary. If you need to make minor adjustments to the cornice, then you can use a knife, file or sandpaper.
3. Gluing
Once you are satisfied with the cut moulding it is time to adhere it in place. Press an even strip of glue on the back of the moulding. Some profiles may be slightly slippery on the glued surfaces, if this is the case you may wish to lightly sand the surface so the adhesive “grabs hold”.
Press in place against the wall/ceiling. When putting up the piece it is much easier if two people do the job, but for shorter lengths working alone is fine. When pressing the moulding against the ceiling and wall you will probably find that a lot of glue runs out. Use a glue/joint compound scraper to remove the excess glue. If this is done correctly, then most of the glue will disappear under the mouldings. Keep in mind that some glue should always seep out from the moulding edges.
Tips for uneven walls:
When fitting the mouldings, you may sometimes find that two pieces do not quite fit together completely. In rare cases, there may be a millimetre difference in the material, and this is usually because the wall is not completely straight. This problem is easily solved by purchasing small spacers. Find the correct dimension (normally a carton is purchased where the spacer thickness varies from 1 to 5 mm), then place it beneath the part that must be lifted out from the wall (or ceiling). Push the pin through. The joint will probably make this little magic trick invisible.
4. Joining
Once the glue has dried as per the instructions on the package, it is time to hide any gaps and to make the moulding blend in with the wall. This is done using joint compound. Do not forget to wipe off the excess with a damp rag at once.
5. Painting
• All polyurethane (PU) mouldings have a fine, white and solid surface. Polyurethane mouldings can be painted using all kinds of paint.
• Styrofoam mouldings must always be painted and may only be painted using water-based paint.