


.png)


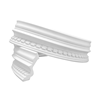


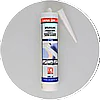


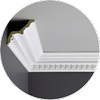
Our ceiling roses are made using a high-quality lightweight material, which makes them easy to fit. To fit a ceiling rose you need glue and joint compounds, as well as a small hand tool to saw out a hole or groove, if needed.
Preparation:
Ensure the ceiling where the ceiling rose will be fitted is flat, even and clean (free from dust and dirt). The ceiling rose should be fitted before the ceiling is painted and it may also be a clever idea to give the ceiling rose a base coat of paint before it is fitted.
1. Use a pencil to mark the location on the ceiling where the ceiling rose will be placed.
2. Make a hole in the centre of the ceiling rose for a lamp cord, lamp canopy and external cable.
3. Press an even strip of glue on the back of the ceiling rose.
4. Press in place by pressing against the ceiling and carefully turning the ceiling rose back and forth.
5. Wipe off the excess glue with a glue scraper. Allow the glue to dry according to the instructions on the package.
6. Join the edges of the ceiling rose to hide any gaps and to allow the ceiling rose to blend in better against the ceiling. It should look as though it has always been there. Wipe off the excess joint compound at once using a joint compound scraper.
7. Now it is time to paint.
• Styrofoam ceiling roses must always be painted and may only be painted using water-based paint.
• Polyurethane ceiling roses do not need to be painted if you feel they blend in well with the ceiling and will only become UV resistant after they have been painted. The material tolerates all kinds of paint.