


.png)


2020-09-30

Nom : Jennie Florentz
Famille : Mariée, deux enfants et un troisième en route !
Habite à : Söderköping, Suède
Age : 28 ans
Métier : Décoratrice d'intérieur
Jennie Florentz est décoratrice d'intérieur et elle propose deux très bons conseils de bricolage pour un bricoleur qui souhaite transformer facilement une armoire usée ou un meuble ordinaire de chez IKEA, mais laissons d'abord Jennie nous parler de son métier.
Travailler en tant que décoratrice d'intérieur est fantastiquement amusant, car cela implique toujours de faire preuve de créativité et de proposer des solutions sur mesure pour chaque client et ses besoins qui sont uniques ! Je travaille pour Noma Design, où nous réalisons des missions de grande et de petite envergure dans tous les types d'environnements : publics comme privés. Il peut s'agir de la décoration d'un bureau, d'une nouvelle construction, d'un projet de rénovation, ou simplement d'aider le client à mettre en place le fil rouge.
En tant que décoratrice d'intérieur, Jennie ne peut évidemment pas s'empêcher de prendre en charge des projets, même dans sa propre maison.

J'adore modifier les chambres de mes enfants en particulier, où l'imagination peut se déployer de manière totalement illimitée ! Refaire un meuble existant ou peut-être un meuble que vous avez acheté au marché aux puces ou chez Ikea peut changer complètement l'ambiance d'une pièce. Ce n'est pas forcément coûteux, c'est bon pour l'environnement, et vous obtiendrez également un meuble totalement unique et personnel !
La cuisine jouet
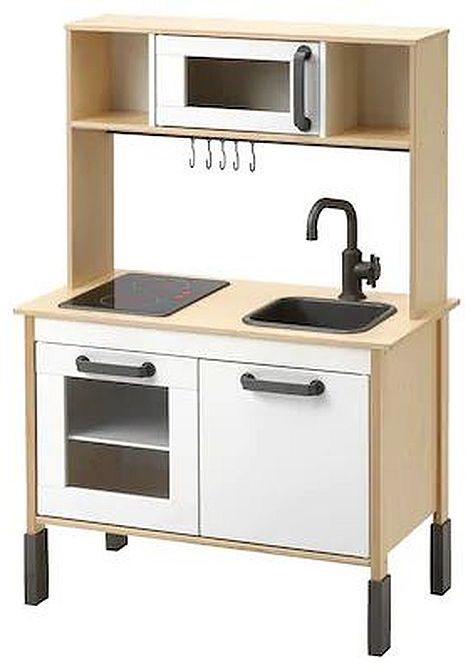
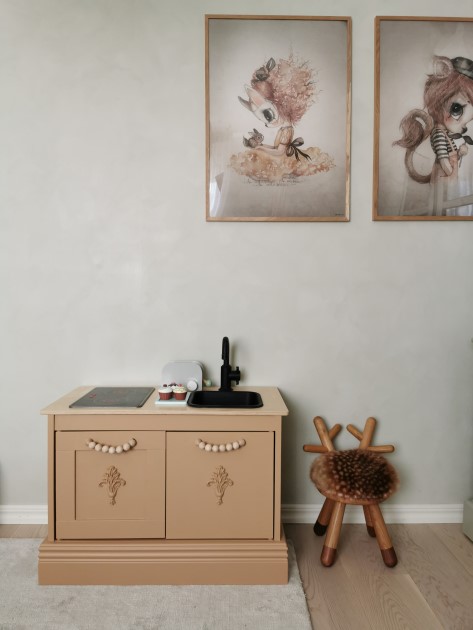
La cuisine-jouet CLEVER d'Ikea a connu de nombreuses formes différentes chez nous : de la simple cuisine moderne en gris avec des poignées en cuir à la dernière variante inspirée du tournant du siècle et de la réutilisation. Cette fois-ci, je voulais réaliser une variante qui puisse s'accorder avec le lit impérial ancien de ma fille et une armoire que j'ai chinée dans un magasin d'occasion.
Voici comment procéder
- Si elle est neuve, installez la cuisine en suivant les instructions. J'ai choisi de ne pas utiliser la partie supérieure cette fois-ci, mais vous pouvez bien sûr faire comme vous le souhaitez. Attendez d'installer le plan de travail et tous les éléments en plastique.
- Lavez le meuble et dépolissez légèrement la surface à l'aide d'un papier de verre. Ceci afin que la peinture accroche de la meilleure façon possible. Essuyez soigneusement toute la poussière du ponçage !
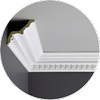
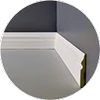
- Montez une plinthe de sol le long de la partie inférieure comme une plinthe. J'ai choisi un élément de 120 mm de haut, qui était parfaitement à la hauteur des pattes de meubles doubles en feutre sous les pieds de la cuisine. Équerrez les coins à 45 degrés et fixez-les avec de la super-colle ordinaire. Utilisez un joint en latex s'il y a des espaces entre les joints.
- Sur les côtés courts, j'ai ensuite collé une tige de quartz plus petite pour couvrir l'espace entre la cuisine et le bord supérieur de la plinthe.
- Apprêtez l'ensemble du meuble avec une peinture primaire. J'ai également peint le couvercle en plastique des deux côtés. Utilisez un pinceau là où vous ne pouvez pas accéder avec un petit rouleau. J'utilise un rouleau en mousse pour un résultat totalement lisse. Suivez les instructions sur le pot.
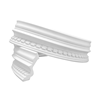
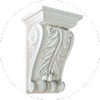
- Décorez les meubles avec des ornements ou des baguettes pour donner un style plus ancien et plus rural à la cuisine. Mesurez l'endroit où vous voulez placer vos ornements. J'ai choisi les ornements A113 de D-cor pour les placer au milieu des portes de l'armoire. Collez-les avec de la super glue.
- Peignez ensuite la cuisine avec du vernis/de la peinture à bois dans la couleur souhaitée en 2-3 couches (comme pour la peinture de base). Faites attention aux coulures, et rectifiez-les entre les couches de peinture si besoin est. J'ai choisi une couleur pure et mate telle que NCS S 3020-Y30R.
- Si vous le souhaitez, les pièces en plastique peuvent être peintes avec de la peinture en spray. J'ai moi-même utilisé une peinture noire mate. Nettoyez d'abord le plastique, un désinfectant ordinaire pour les mains fera l'affaire ! Une fois que la peinture est sèche, vous pouvez les fixer sur le plan de travail.
- Remplacez les boutons de porte à votre guise. Vous pouvez soit acheter des produits tout prêts que l'on trouve dans le commerce, soit en faire vous-même. J'ai utilisé des billes de bois ordinaires que j'ai enfilées sur des cordes en coton et attachées avec des doubles nœuds à l'intérieur de la porte.
- Si, comme moi, vous ne souhaitez pas utiliser le haut de la cuisine, vous pouvez fixer des boutons ou des crochets sur l'un ou les deux côtés courts. Cela vous permet d'y accrocher des ustensiles et le torchon de cuisine ! Ou pourquoi pas un montant sur le mur ?
- Montez le plan de travail (et si vous le souhaitez, la partie supérieure également). J'ai utilisé des blocs de menuiserie pour remplir les trous dans le plan de travail à l'endroit où l'armoire supérieure aurait dû se trouver.
- Prêt pour jouer !
Le cabinet
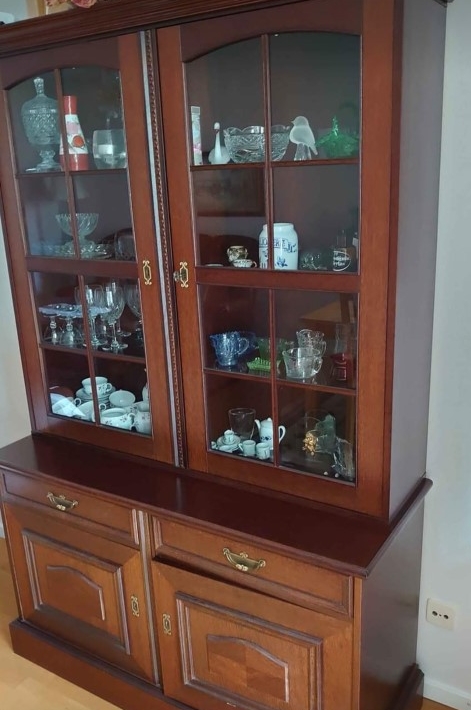
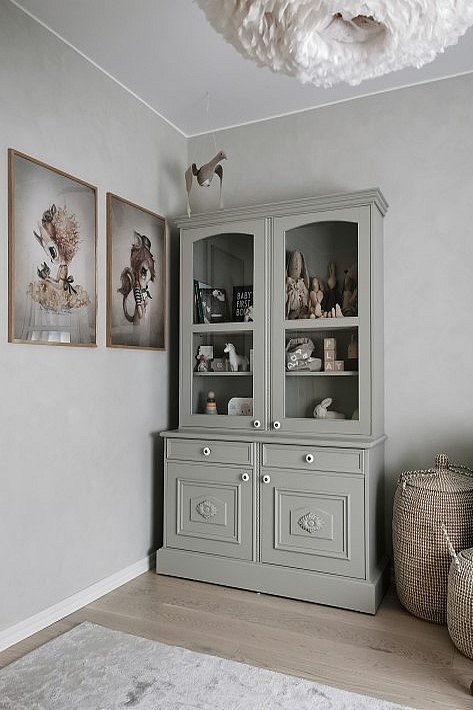
Le grand cabinet est une vieille vitrine que j'ai trouvée sur Marketplace pour seulement 250 couronnes suédoises. Mon mari a pensé que j'étais folle d'acheter un vieux meuble délabré. Il se demandait ce que nous allions en faire. Cependant, j'ai moi-même voulu le rénover en profondeur et l'utiliser comme lieu de rangement pour les jouets et les livres !
Voici comment faire :
- Retirez les accessoires et les éléments qui ne seront pas utilisés par la suite. J'ai supprimé les anciennes étagères en verre et les fissures sur les volets en verre car il était impossible de les peindre des deux côtés.
- Lavez les meubles avec un produit de nettoyage pour peinture, et poncez le vernis avec un papier de verre. Il est préférable d'utiliser une meuleuse pour un meuble de cette taille ! Essuyez soigneusement toute la poussière du ponçage. Utilisez un joint de menuiserie pour réparer tout dommage.
- Appliquez la couleur de base sur les meubles avec un seul pinceau. Utilisez un pinceau là où vous ne pouvez pas accéder avec un petit rouleau. J'utilise un rouleau en mousse pour un résultat totalement lisse. Suivez les instructions sur le pot.
- N'hésitez pas à décorer le meuble avec des ornements ou des moulures pour obtenir un aspect classique et élégant pour un meuble autrement ennuyeux. J'ai choisi l'ornement Z511 de D-cor que j'ai placé au milieu des panneaux inférieurs parce que je trouvais qu'il manquait quelque chose à cet endroit ! Je les ai fixés avec de la super glue ordinaire. 68 couronnes suédoises bien investies ; l'ornement a considérablement rehaussé le meuble !
- Peignez ensuite l'ensemble du meuble avec du vernis/de la peinture pour bois en utilisant 2-3 pinceaux dans la couleur souhaitée (comme pour la couleur de base). J'ai choisi une peinture pour bois pure et mate dans la couleur NCS S 3005-G80Y.
- J'ai également acheté de nouvelles étagères en pin dans le commerce, coupées aux bonnes dimensions et peintes de la même couleur.
- Remplacez les accessoires si vous le souhaitez. J'ai choisi un bouton plus soigné en porcelaine et en laiton antique.
- Vous devrez probablement garnir les caissons avec un nouveau tissu. Mes caissons étaient recouverts d'une couverture verte qui ne pouvait pas être enlevée. J'ai utilisé un tissu d'ameublement durable en lin beige que j'ai collé au fond avec de la colle pour textile. Ensuite, j'ai recouvert les bords du tissu avec un morceau de baguette de quart que j'ai collé avec de la super glue.
- Fini !
Merci Jennie pour ces deux super conseils ! Si vous souhaitez en découvrir davantage sur Jennie et sa magnifique maison, suivez @nordicgrey sur Instagram. Si vous souhaitez faire appel à Jennie, vous pouvez envoyer une demande à l'adresse suivante : jennie@florentz.se.